
This blog explains techniques to acheive single sign on in your office 365 tenant by bypassing Office 365 Home realm discovery(a.k.a HRD–> https://login.microsoftonline.com ) page.If your Office 365 setup does not have the following setup then this blog does not apply to you:
- AAD with Federated identity with third party Identity provider such as ADFS/CA Siteminder etc. If you are unsure about what “Federated identity” means please go through this post.
What is the default experience?
For all the tenants with federated identity the default experience is as below:
- Users navigates to https://portal.office.com or to any SharePoint site. Let’s say : https://mytenant.sharepoint.com.
- At this point, if the user is not logged in already he/she will be redirected to https://login.microsoftonline.com/. This is also called s the HRD page for Office 365.At this moment the user will be asked to type in his email or phone (typically most users authenticate with email). So user types in the email.
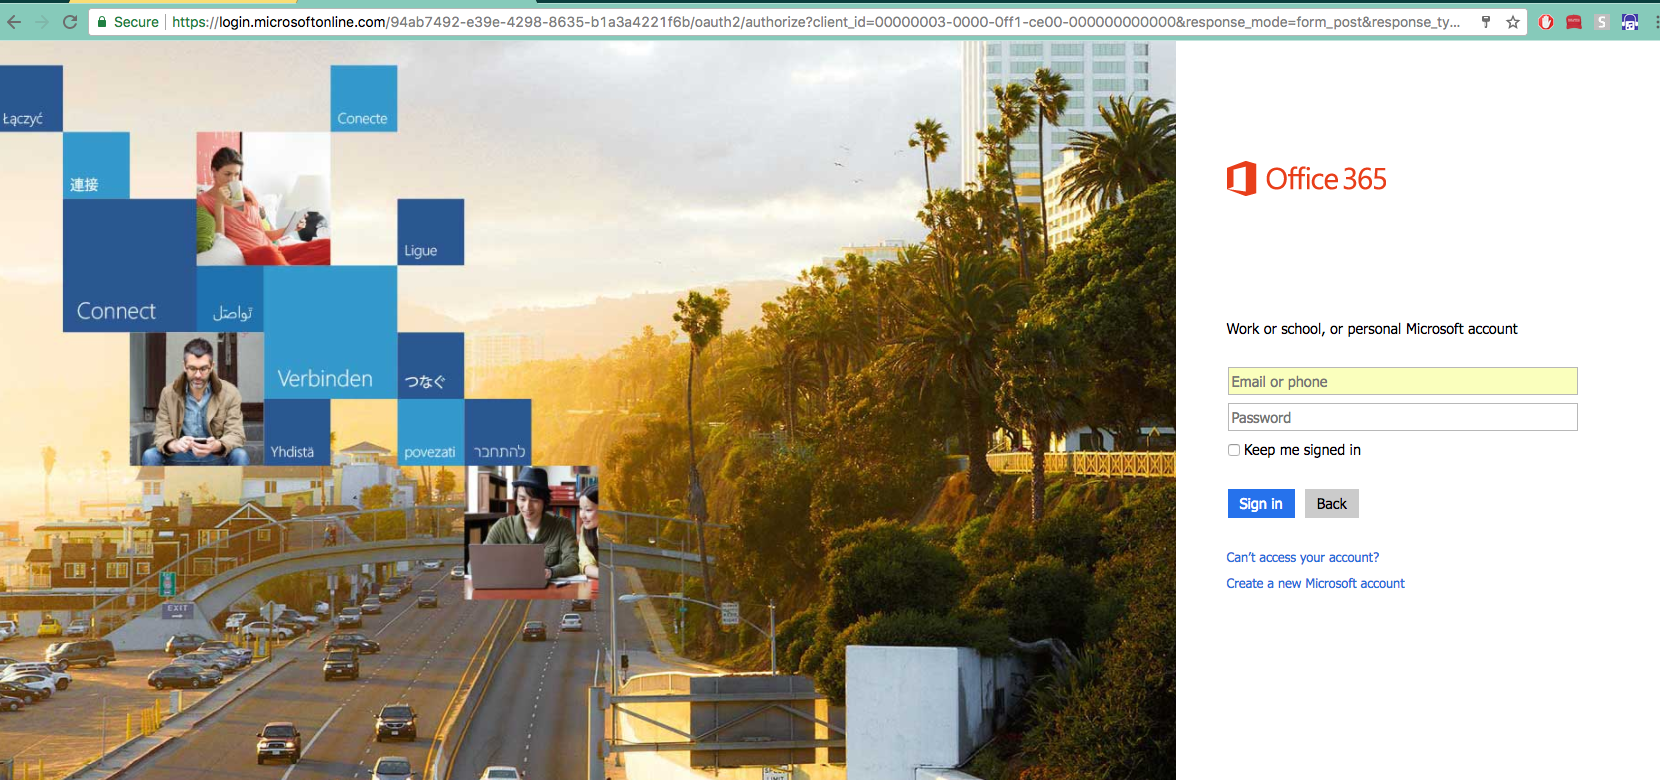
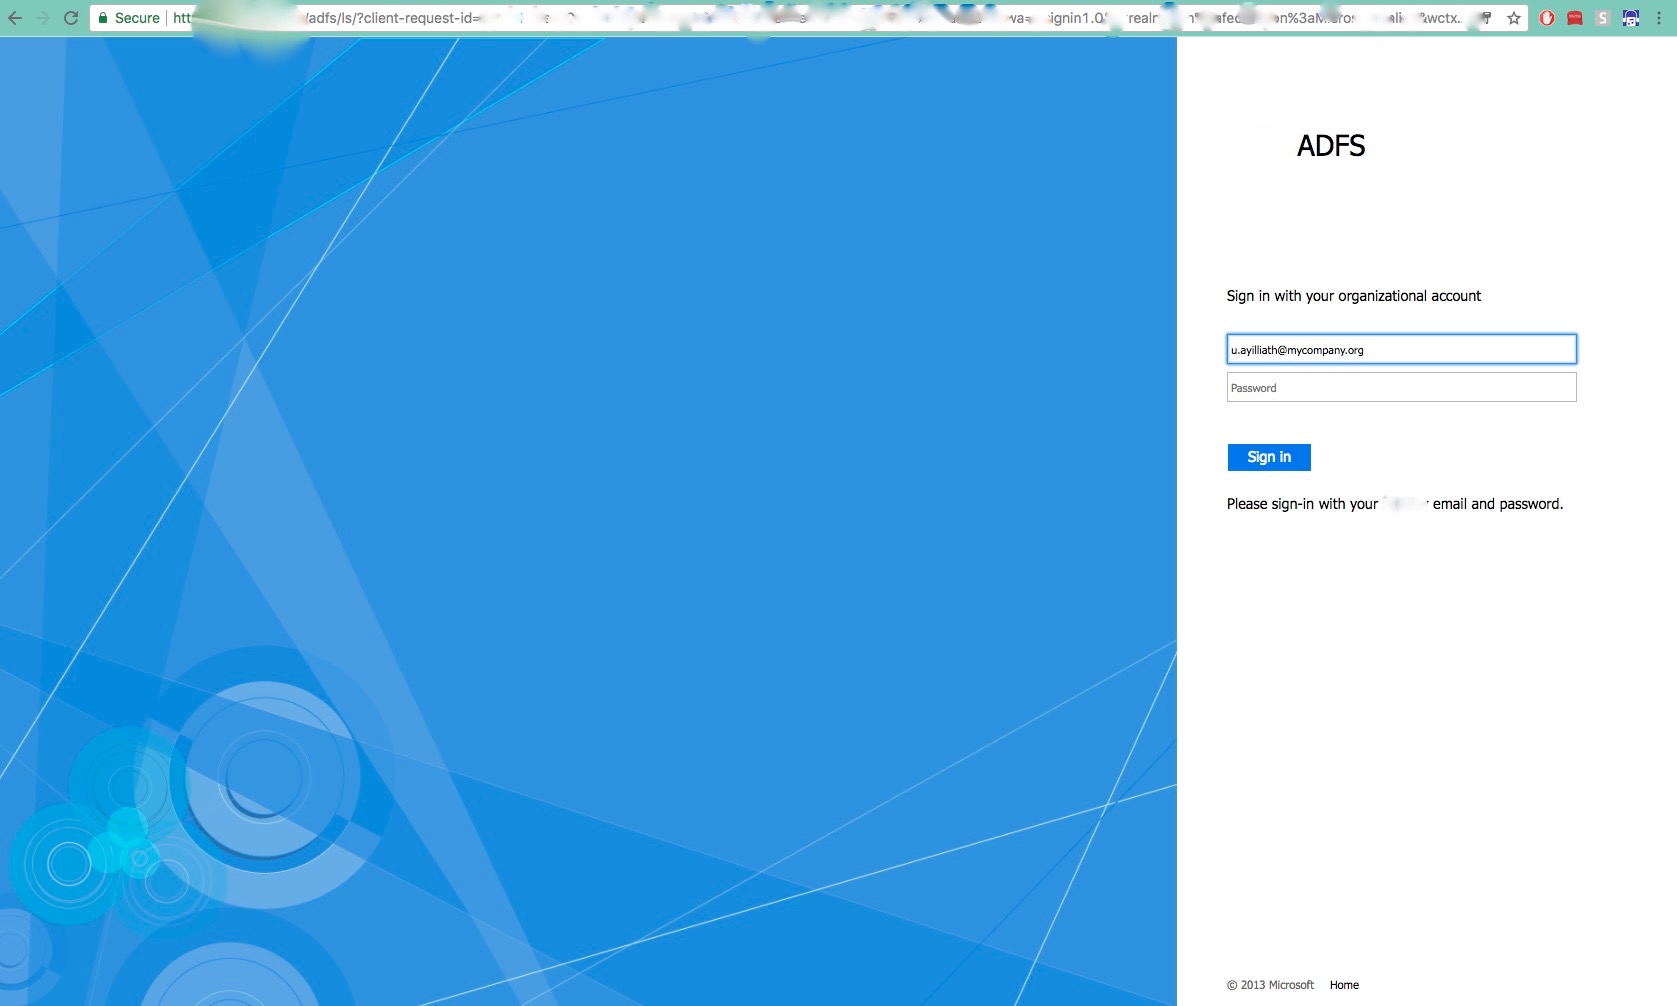
3. Now as soon as the user types in the email and clicks outside the textbox or uses tab, since the identity registered with that email is a federated identity, the user will be redirected to the identity provider login page. Let’s consider on-premise ADFS for this example:Here user’s email id will be prepopulated on load and user needs to type in the password and once successfull user will be redirect back to portal.office.com or to the original resource user was trying to access. Now if user is accessing this page in the same domain joined computer, then user will be auto logged in using the windows login account (user need not enter password here) and redirected back to the original resource.
What does this blog help you solve?
This blog is all about techniques to enable single sign on and improving the user experience by bypassing the login.microsoftonline page and enable user requests to reach directly to your ADFS and then back to the original requested resource. So in this way when the user tries to access: https://mytenant.sharepoint.com or tries to go to Office 365 home (ie https://portal.office.com) he will be automatically logged in without having to type in username & password in any of the pages mentioned above (only when connecting through same domain computers).
What are the solutions?
Okay now let’s look at the two options to achieve this. Please bear in mind that each option applies to specific scenarios and there is no silver bullet (yes, there is now Azure AD Pass-through Authentication) which fits all use cases.
1. Azure AD Pass-through Authentication (Recommended):
This is the newest addition to authentication methods in Azure. Here instead of having an ADFS , you will need to install a Pass-through authentication agent in your on-premise environment. This agent will validate the user credentials directly against the on-premises Active Directory. This is the preferred way to move ahead as it provides better user experience i.e seamless authentication when inside organisation network and users (both internal + guest users) will be shown the login page when accessing from outside of your network.
One of other key advantages with this method is that you don’t have to configure auto-acceleration, thus Guest users won’t be accelerated to ADFS page but they will be displayed the login page since they are accessing from outside your organisation network.
Read more about Pass-through authentication

2. Auto-Acceleration:Auto acceleration is a technique which can be used to bypass the HRD page (login.microsoftonline) when user tries to access any SharePoint Online pages or SharePoint Online admin center pages. This technique only applies to SharePoint Online /SharePoint Online admin center and does NOT support any other office 365 product pages like https//portal.office.com etc. Also this technique is NOT recommended if you have multiple identity providers for your tenant.
Enabling Auto-Acceleration
You need to run below powershell command.
Set-SPOTenant –SignInAccelerationDomain “yourdomain.com”
To disable the auto-acceleration, run below command:
Set-SPOTenant –SignInAccelerationDomain “”
Limitations
- Auto-Acceleration will work only for those site collections that has external sharing disabled. If you wish to auto-accelerate the sites where external sharing is enabled, then you need to enable GuestSignInAcceleration by running below commands:
Set-SPOTenant -EnableGuestSignInAcceleration $true
To disable it run below command:
Set-SPOTenant -EnableGuestSignInAcceleration $false
- If you enable auto-acceleration for Guest accounts , then you must configure the identity provider login page to support guest user login, which means it should have some option for guest users to click through and navigate to AAD login page (login.microsoftonline).
- Auto-Acceleration does not support anything other than SharePoint Online sites & SharePoint Online admin center.
- This supports only single identity provider. If you have multiple identity provider then you must create an intermediate page where the user needs to select the identity provider. This is not recommended as it does not solve the original user experience issue which we are trying to solve here.
3. Smart Links
This has existed for long time and this is a hack rather than a feature of office 365.Below is a summary of how smart links work :
- Firstly create a smart url to bypass the office 365 home realm discovery. This is a special url with some extra parameters in the querystring which will enable Azure AD to automatically redirect the request to the federated identity provider login page.
Now how to generate the special url? It’s fairly simple, you just need to fill in the exact placeholders in the below format:
https://login.microsoftonline.com/login.srf?wa=wsignin1.0&whr=[yourdomain]&wreply=[targeturl]eg: if your company domain is “bestcompany.com” and you want to generate a smart url for https://portal.office.com then your url will be as below:https://login.microsoftonline.com/login.srf?wa=wsignin1.0&whr=bestcompany.com&wreply=https://portal.office.com - Now you need to create a new blank website (IIS/Apache or anything of your choice) for each url you want to acheive SSO. Example: For https://portal.office.com you would create a website like https://office.yourcompany.com . You need to publish this url, so that it is accessible through the internet or in your intranet, depending on your needs.
- Now create a redirect rule for all requests coming in to your website to be redirected to the smart link url generated for that particular resource.
- Now when any user access https://office.yourcompany.com they will auto redirected to smart link , the smart link then redirects user to the federated identity provider and if the user is accessing from the domain joined computer, then he/she will be automatically signed in and redirected to https://portal.office.com
Limitations
- New “fake” or company branded urls needs to be generated for each office 365 url which needs to be SSO ed.E.g:Office 365 Home: https://portal.office.com –> https://office.yourdomain.comSharePoint Home: https://yourdomain.sharepoint.com –> https://sharepoint.yourdomaincomDelve: https://delve.office.com/ –> https://delve.yourdomain.com
- If user bookmarks any office 365 page including SharePoint online and tries to access the site first time through the bookmarks , he/she will end up in login.microsoftonline.com and SSO will not happen seamlessly.
- You will have to run campaign in your company to make user familiarise with this fake urls by making these as home page for browser etc.
Use case scenarios: Auto-Acceleration vs Smart Links
- SharePoint Online sites(Single Federation): If you have only single federation in your tenant and without or with external sharing(some caveats with sharing) , you should go with Auto-Acceleration for your sharepoint sites. It’s just a piece of cake to configure and provides tremendous improvement to user experience especially if SharePoint user base if more.
- SharePoint Online sites (Multiple federation):If you have multiple federation inside the tenant, it is better to utilize smart links in the scenario. Let’s consider a scenario where you have 2 federation one for intranet users & another one for extranet users. So in this scenario you can create 2 smart links:
Intranet SharePoint–> https://intranet.yourcompany.com –> https://login.microsoftonline.com/login.srf?wa=wsignin1.0&whr=%5Bintranetdomain%5D&wreply=%5Btargeturl%5D
Extranet SharePoint –> https://extranet.yourcompany.com –> https://login.microsoftonline.com/login.srf?wa=wsignin1.0&whr=%5Bextranetdomain%5D&wreply=%5Btargeturl%5D - Other Office 365 products (non-SharePoint): For all your non SharePoint Office 365 products , it is worth to configure smart links to improve user experience.

Leave a comment