
ExtensionAttributes (1-15) are custom attributes available in both on-premises Active Directory and Microsoft Entra ID (if synced). These attributes are often used for storing additional information about users that doesn’t fit into the standard set of attributes
If your application needs to access these attributes, you can include them as claims in the tokens issued by Microsoft Entra ID.
For the purpose of this blog, let’s consider an hypothetical scenario where extensionAttribute1 contains a 3 digit Department Code of users & extensionAttribute2 contains IsoCode2 of the country of the work location.
Prerequisites
- Microsoft Entra ID: A tenant with users that have ExtensionAttributes synchronized from on-premises AD (if applicable).
- You have at least Cloud Application Administrator privileged role.
Step 1: Register an OIDC App in Microsoft Entra ID
If you do not already have an existing app to configure , then register a new app following this documentation.
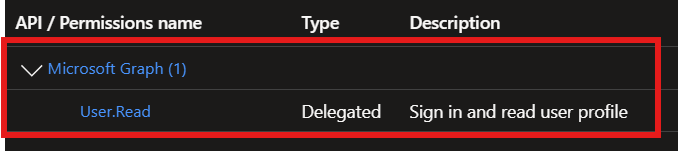
Make sure you create OIDC app and atleast User.Read permission granted and admin consent is granted.
Step 2: Add Custom Claims
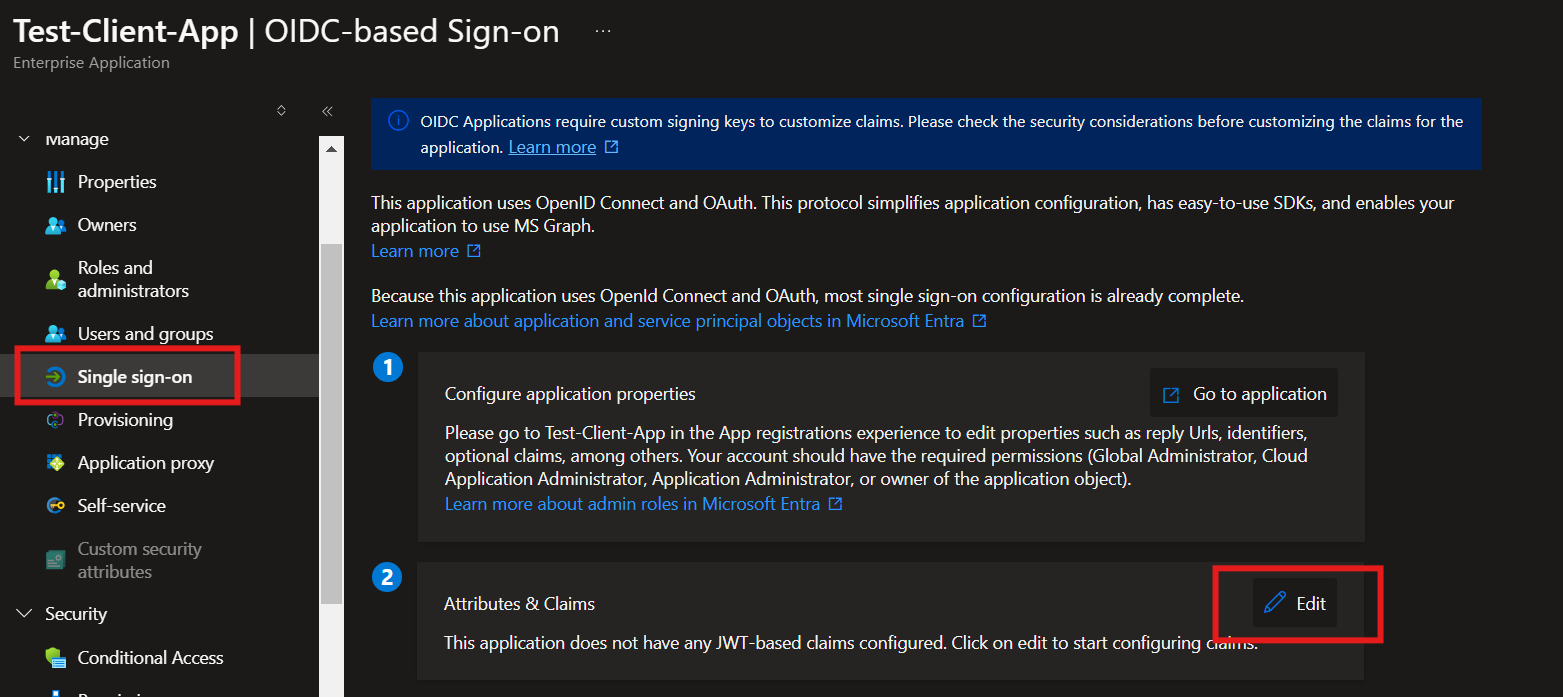
In Entra Admin Center, go to Enterprise Applications and locate your App.
Click on Single sign-on on the left panel and then Edit Attributes & Claims section.
In the Attributes & Claims screen, click on Add new claim.
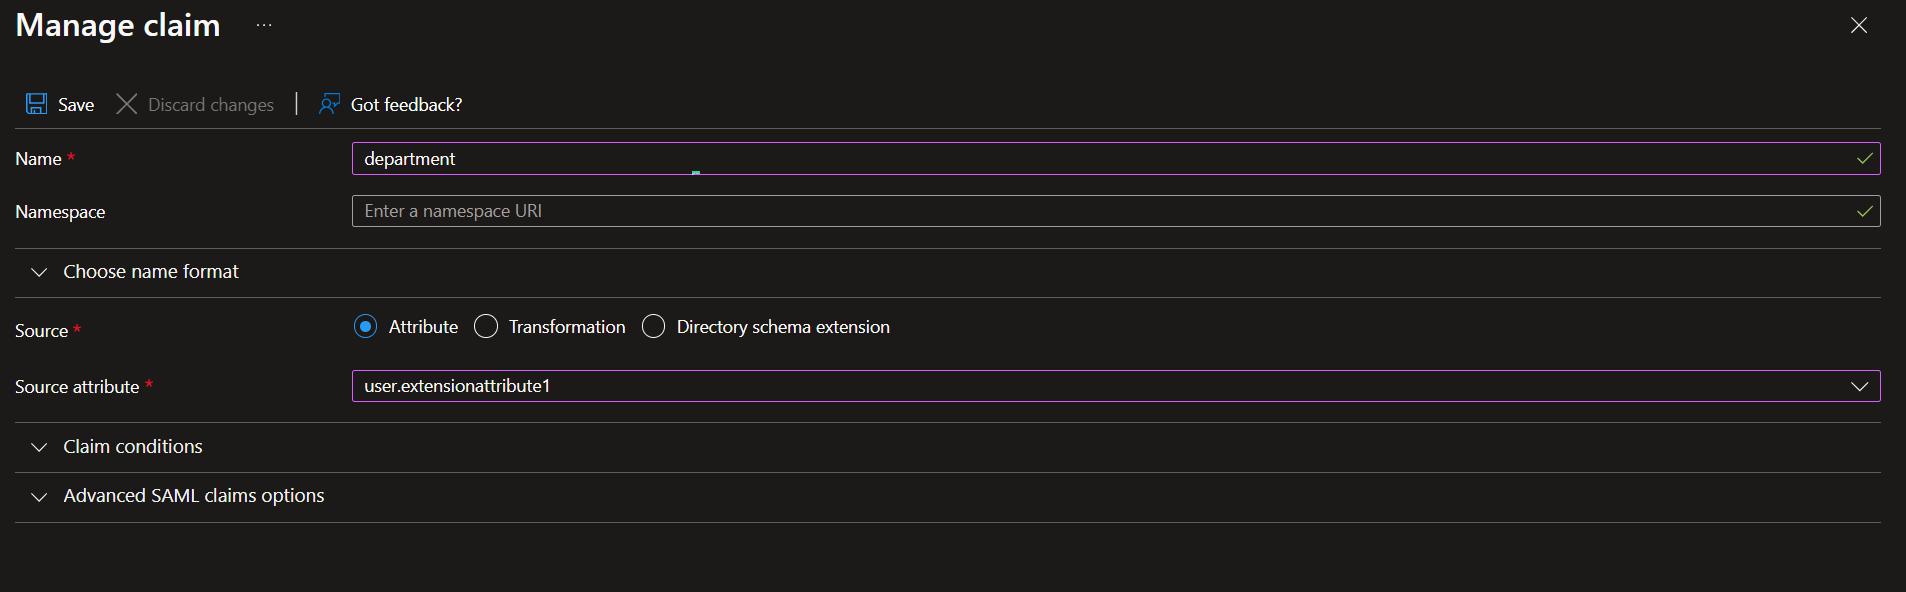
In the next screen you can give the desired name of the claim and then choose the source mapping. In the Source Attribute dropdown list, you can see all the extensionAttibutes from 1-15.
Add one by one all the additional claims you need to pass to client applications.

Step 3: Update the application manifest (Only for single tenant apps)
If you are using single tenant app, then next step is to update the acceptMappedClaims property to true in the application manifest file.

If you are using multi-tenant app, the step 3 is more complex. You will need to configure a custom signing key instead of the above step of setting the acceptMappedClaims property. Follow this Microsoft Documentation for multi-tenant apps
The requested token audience must use a verified domain name of your Microsoft Entra ID tenant. So, set the Application ID URI or identifierUris in the application manifest to a verified domain like https://test.yourdomain.org (assuming yourdomain.org is verified domain of your tenant) or use the default tenant name https://<yourtenant>.onmicrosoft.com/api.

Step 4: Verify if everything works!
Next, the use your client application to authenticate user to this app. Make sure that you provide the value of scope parameter with /.default appended to the Application ID URI. e.g https://test.yourdomain.org/.default .
If you do not have any client application created yet, you can use Postman to test the set up. Follow this blog for working with Postman and Microsoft Entra ID app. Just ensure that scope has the correct value specified as mentioned above.
After authentication, you can decode and check your access token (either using your app or using jwt.ms ) and you will see the custom claims and their values for the logged in user.

References: https://learn.microsoft.com/en-us/entra/identity-platform/jwt-claims-customization

Leave a comment